 simpler
Sky and weather
The Environment is the light of your scene, and light is what makes an image. With one click on a preset the sun, the sky, the clouds and the exposure change together; then you refine. Everything is physical: the sun is exactly where it would be at that hour, on that day, at that latitude.
Presets and the sun#
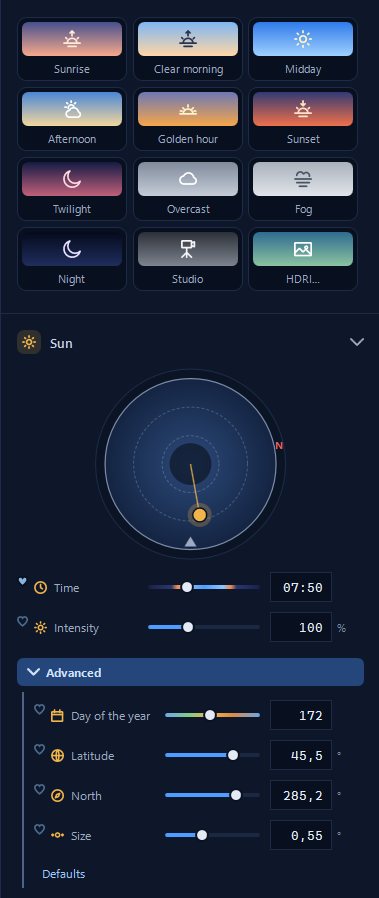
Open the Environment panel with the globe in the toolbar. The presets are complete atmospheres, and they are the best place to start: Sunrise, Clear morning, Midday, Afternoon, Golden hour, Sunset, Twilight, Overcast, Fog, Night, Studio for products, and HDRI… to use a photographed sky from the library. Try a few on your scene before deciding: the same building tells a completely different story at midday and at golden hour.
The Sun section shows a dial seen from above: the orange dot is the sun and N is north. You can drag the dot, but most of the time you will use Time: it is real solar time, so at 12:00 the sun is due south at its highest, and after sunset it goes out. Intensity at 100% is a real sun.
Under Advanced the sun becomes astronomy. Day of the year moves it through the seasons: high in June, low and slanting in December. Latitude puts your scene on the map: 45.5° for Milan, 51.5° for London, negative values for the southern hemisphere. North turns the compass, so the sun rises from the right side of your building. Size is the apparent diameter of the sun: 0.5° gives the crisp shadows of a clear day, larger values the softer ones of a veiled sky.
In a room with windows facing the sun, a low morning sun draws the shape of the windows on the floor. Move Time by half an hour at a time and watch the patches of light slide across the room: choose the moment you like, then render.
Sky#
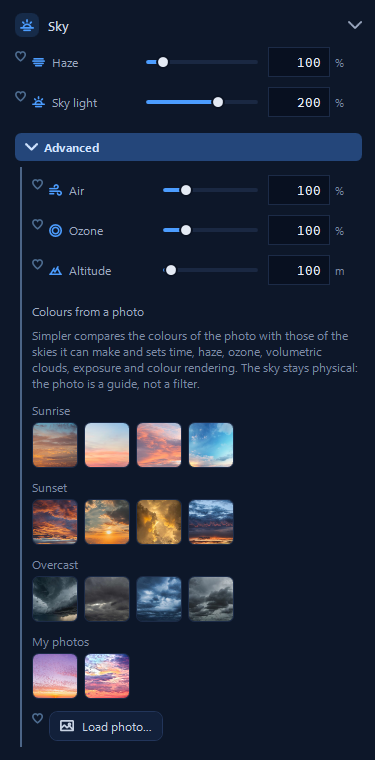
Haze is the air between you and the distance: more haze, and far mountains fade into a pale blue, giving the image depth. Sky light is how much the blue of the sky lights the scene: it is what makes shadows bluish and light on a sunny day. Under Advanced, Air, Ozone and Altitude are the physical ingredients of the colour of the sky, for those who like to experiment.
The section Colours from a photo is a small magic trick. Choose one of the reference photos, a sunrise, a sunset, a stormy sky, or Load photo… with one of your own. Simpler compares the colours of the photo with the skies it can make and sets time, haze, ozone, clouds, exposure and colour rendering to match it. The sky stays physical: the photo is a guide, not a filter pasted on top.
Clouds#
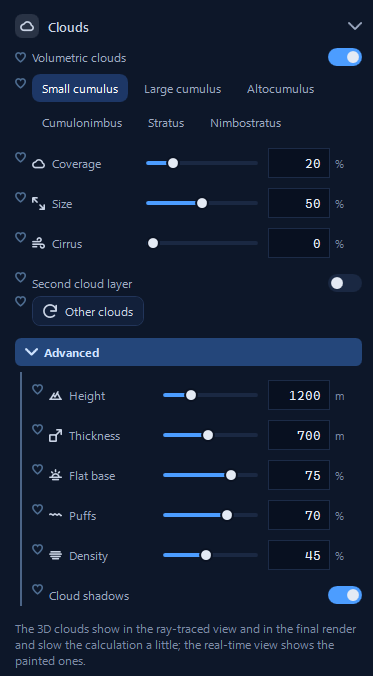
Turn on Volumetric clouds and choose a kind: Small cumulus for a fine day, Large cumulus, Altocumulus, the towering Cumulonimbus of a summer storm, the grey blankets of Stratus and Nimbostratus. Coverage says how much of the sky is cloudy, Size how big each cloud is, and Cirrus adds the thin, high clouds. If you do not like where the clouds are, Other clouds rearranges them.
Under Advanced you can shape the clouds like a meteorologist: Height and Thickness, a Flat base like real cumulus, Puffs and Density. Cloud shadows lets the clouds cast shadows on the ground and on your scene, the moving patches of light and shade of a windy day.
3D clouds appear in path tracing and in the final render, and slow the calculation a little; the real-time view shows painted clouds.
Haze and fog#
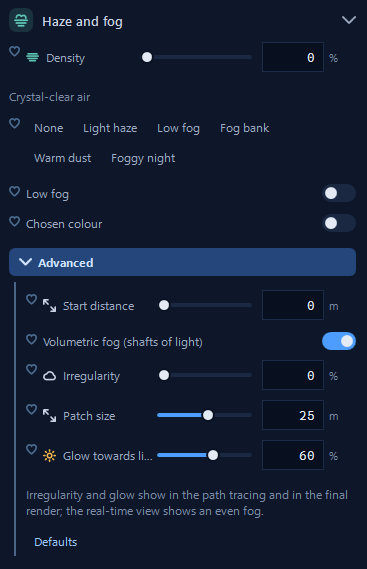
Fog is one of the easiest ways to give an image atmosphere. Start from a preset, Light haze, Low fog, Fog bank, Warm dust or Foggy night, then adjust the Density. Low fog stays close to the ground, like morning mist in a valley, and Chosen colour tints it.
Under Advanced you find the most spectacular effect: Volumetric fog (shafts of light), the visible beams of sunlight through a window, among trees or into a church. Start distance keeps the fog away from the camera, Irregularity and Patch size break it into patches, and Glow towards lights makes it shine around the light sources.
Shafts of light need Volumetric fog on and just a little density: too much and the whole image turns milky. They show in path tracing and in the final render; the real-time view shows an even fog.
Rain#
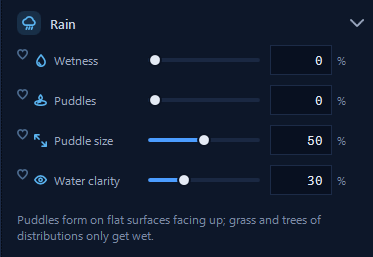
Rain in Simpler has two parts: what the rain leaves behind, and the rain that is falling. The first is often enough for a beautiful image. Wetness makes every surface darker and shinier, as after a shower; Puddles adds puddles on the flat surfaces facing up, with their Puddle size and Water clarity, while grass and trees only get wet.
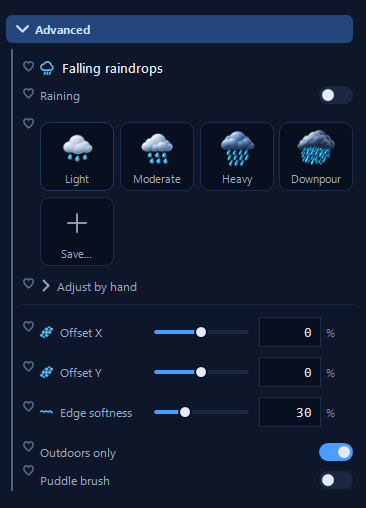
Falling drops are under Advanced: turn on Raining and choose Light, Moderate, Heavy or Downpour, or adjust by hand and Save… your own preset. Outdoors only keeps the rain away from porches and covered areas, and the Puddle brush lets you paint puddles exactly where you want them.
For a street after a storm: Wetness 80%, Puddles 40%, no falling drops. The asphalt reflects the shop windows and the street lamps, and the image is instantly more interesting than a dry street.
Snow#
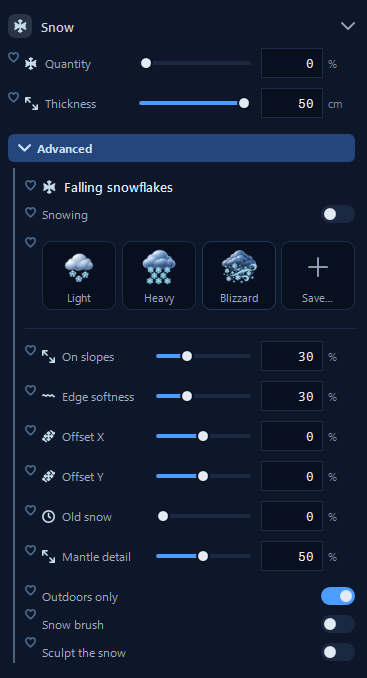
Quantity and Thickness cover the ground and the objects with snow: a light dusting at low values, a thick mantle on roofs and car bonnets at high ones. Under Advanced you decide how much stays On slopes, how soft the edges are, whether it is Old snow (greyer and more compact), and the Mantle detail. Falling snowflakes works like the rain: Snowing with Light, Heavy, Blizzard or your own preset. With the Snow brush you add snow where you want it, and Sculpt the snow lets you model drifts by hand.
The snow is recalculated when you move objects. While you arrange a big snowy scene, the snowflake button of Lighten hides it for a while.
Night#
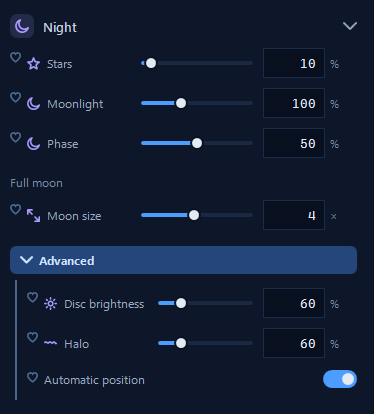
When the sun goes down the night takes over. Stars fill the sky, Moonlight decides how much the moon lights the scene, Phase goes from new moon to full moon (50%), and Moon size can make it larger, as photographers do with long lenses. Under Advanced you find the Disc brightness, the Halo and Automatic position, which puts the moon where it would really be.
At night the lamps and luminous materials with Dusk to dawn switch on by themselves: a street or a house comes alive without you touching a single light.
Ground and exposure#
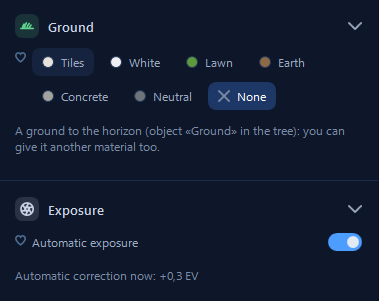
The Ground is the floor that reaches the horizon, the object «Ground» in the scene tree: Tiles, White, Lawn, Earth, Concrete, Neutral or None. You can drag any material onto it too.
Exposure works like a camera. With Automatic exposure on, Simpler reads the light of the scene and corrects the exposure, and the panel tells you how much (for example +0.3 EV): so a scene at midday and the same scene at dusk are both well exposed without you doing anything. Turn it off when you want full control, and set the exposure by hand in Camera and colour.