 simpler
Artificial intelligence
The artificial intelligence of Simpler starts from your render and takes it one step further: more photographic, with people, with furniture, in another season, or moving in a short video. Your scene stays yours; the AI works on the picture. It uses your own keys of OpenAI (images) and Krea (videos): you pay the provider directly, only for what you use.
Before you start: the keys#
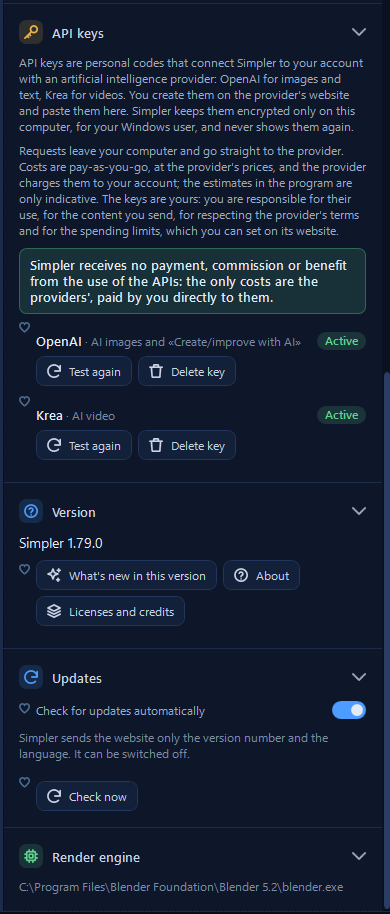
An API key is a personal code that connects Simpler to your account with an AI provider, a bit like the key of your house that you lend to a trusted friend. You create it on the provider's website and paste it in Settings ▸ API keys: the OpenAI key enables the AI images and the Create/improve with AI help for writing, the Krea key the AI videos. Test again checks that a key works, Delete key removes it.
Simpler keeps the keys encrypted, only on this computer and for your Windows user, and never shows them again.
Requests leave your computer and go straight to the provider. Costs are pay-as-you-go, at the provider's prices, and the estimates in Simpler are only indicative. Simpler receives no payment, commission or benefit from the use of the APIs. You are responsible for the content you send and for respecting the provider's terms, and you can set spending limits on the provider's website.
When the OpenAI key works, the AI image button in the toolbar turns orange.
The AI image panel#
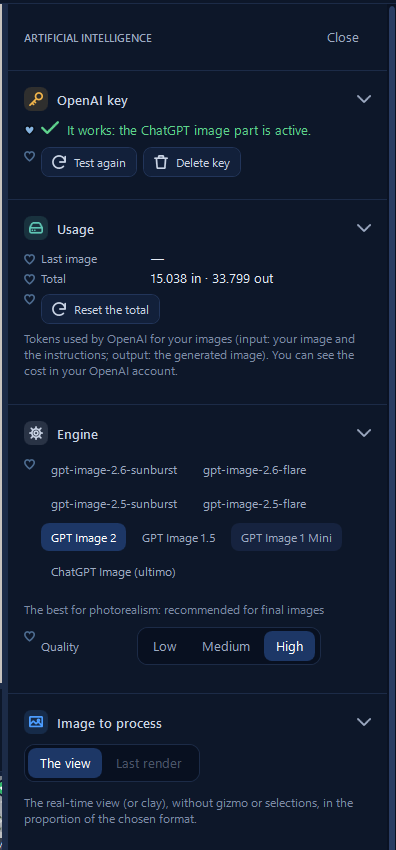
The panel reassures you straight away that everything is ready («It works: the ChatGPT image part is active») and shows the Usage: the tokens of the last image and the running total, which you can reset. Tokens are what OpenAI counts, your image and instructions going in and the generated image coming out; you find the cost in your OpenAI account.
In Engine you choose the model; the panel tells you which one is best for photorealism and recommended for final images. Quality goes from Low, for quick tries, to High for the image you will deliver. In Image to process you choose what to send: The view, the real-time view or clay without gizmos and selections, in the proportions of the format you chose, or the Last render.
The functions#
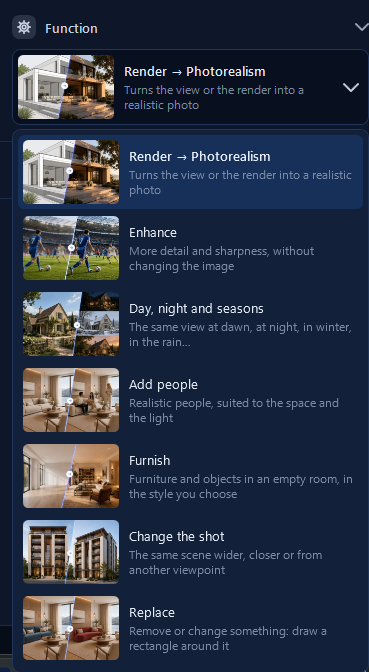
Each function is a different job, described in plain words, and you guide it with a few choices instead of writing long prompts.
Render → Photorealism turns the view or a render into a realistic photograph: it is the function to use when a scene is nice but still looks like a render. Enhance adds detail and sharpness without changing the picture. Day, night and seasons shows the same view at dawn, at night, under snow or in the rain, which is great for showing a project in different moods. Add people brings realistic people suited to the space and the light, the step that makes an empty architectural image come alive. Furnish fills an empty room with furniture and objects in the style you choose. Change the shot shows the same scene wider, closer or from another viewpoint. Replace removes or changes something: draw a rectangle around it and describe what you want, or show it with the photo of an object.
Render → Photorealism#
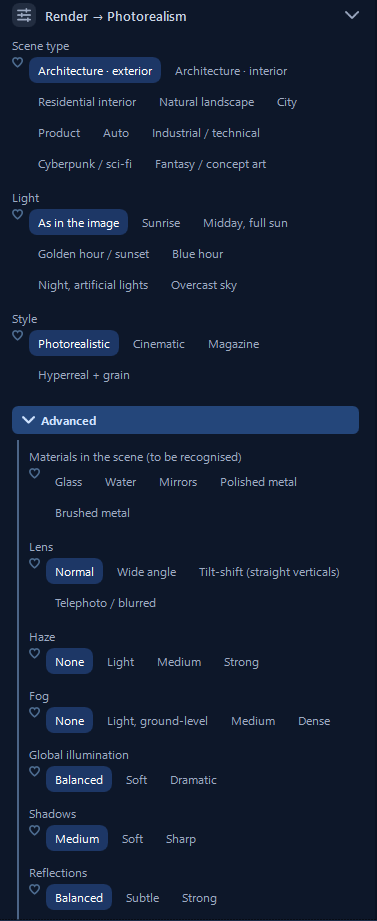
Instead of a prompt, you describe your image with a few clicks. Scene type tells the AI what it is looking at: an exterior or an interior, a natural landscape, a city, a product, a car. Light says what light you want, from «as in the image» to sunrise, golden hour, blue hour or night with artificial lights. Style gives the overall feel: Photorealistic, Cinematic, Magazine or Hyperreal + grain. Under Advanced you can point out the materials it should recognise, like glass, water and polished metals, and fine-tune lens, haze, fog, global illumination, shadows and reflections.
Add people#
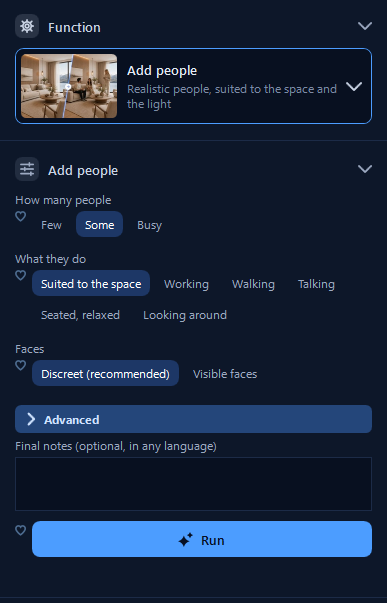
Choose How many people, from Few to Busy, and What they do: Suited to the space lets the AI decide, or you can ask for people working, walking, talking, seated or looking around. For Faces, Discreet (recommended) keeps them natural and not too prominent, which is what you want in architecture. In the final notes you can add a request in any language, then click Run.
Start from a path-traced view or a final render: the better the light of your image, the more natural the AI result.
AI video#
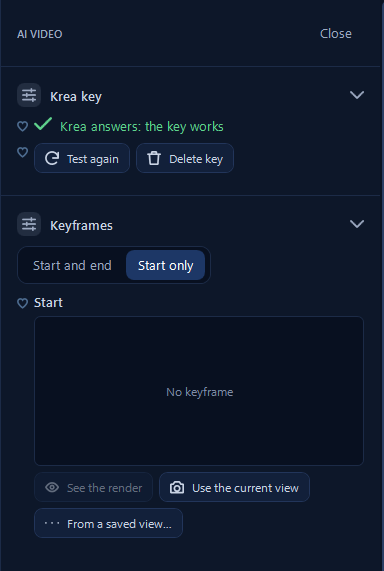
With the clapper button in the toolbar you can turn two views of your scene into a short video of a few seconds, made by Krea: a camera that slowly rises over a building, people walking towards a house, a sunset over a terrace.
- Choose the keyframes: Start and end, two views between which the video moves, or Start only. For each one, Use the current view or From a saved view…, one of your saved scenes; See the render shows it.
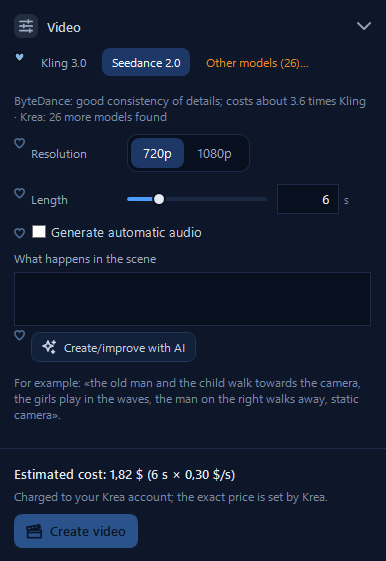
- Choose the video: the model (for example Kling 3.0 or Seedance 2.0, with Other models… listing all those Krea offers; the panel tells you how they compare in quality and price), the Resolution and the Length in seconds. Generate automatic audio is optional.
- Describe what happens in the scene, for example «the old man and the child walk towards the camera» or «the camera slowly rises above the roof». If you are not sure how to write it, Create/improve with AI writes or improves the description for you.
- Check the estimated cost (for example 6 s × 0.30 $/s) and click Create video.
The video is charged to your Krea account, and the exact price is set by Krea. The finished videos are in the library, Project ▾ ▸ AI outputs.