 simpler
First steps
In this chapter you install Simpler, open one of the example scenes and make your first image. It takes about ten minutes, and most of that time is the installer copying files while you make a coffee.
Installing Simpler#
Everything comes in a single file that you download from the download page: Simpler-Setup-<version>.exe. It contains Simpler, its render engine and the right version of Blender, already tested together, so you do not need to install anything else.
When you start the setup, Windows may show a blue window saying «Windows protected your PC». Do not worry: Windows shows it for programs that it has not yet seen downloaded many times, and a young project like Simpler is exactly that. Click More info, check that the publisher is Luca Rodolfi, and choose Run anyway.
The wizard then guides you through a few pages. After the licence agreement, in Italian and English, the page Your computer tells you which graphics card it found and how suitable it is for Simpler: a quick way to know what to expect. Then you choose two folders: where to put the program, and the contents folder, where Simpler will keep the models, plants and materials you download later, together with your copies of the example projects. If you have a second, larger disk, the contents folder is the one to put there. At the end leave the box ticked and Simpler starts.
Simpler speaks Italian if Windows is in Italian, and English with every other language. You can switch at any time in Settings ▸ Language.
What your computer needs#
Simpler runs on 64-bit Windows 10 (version 1809 or later) and Windows 11. The heart of the work is the graphics card: an NVIDIA RTX is ideal, an older GTX works more slowly, and the engine also supports AMD Radeon RX and Intel Arc. Without a suitable card Simpler can still render on the processor, but you will need a lot of patience.
The program takes about 2 GB of disk. The library of models and plants is about 11 GB in total, but you never download it all at once: each item is downloaded the first time you use it.
The first start#
Simpler opens on an empty scene: a ground that reaches the horizon, the sky, and the welcome box called «Blender, but simpler».
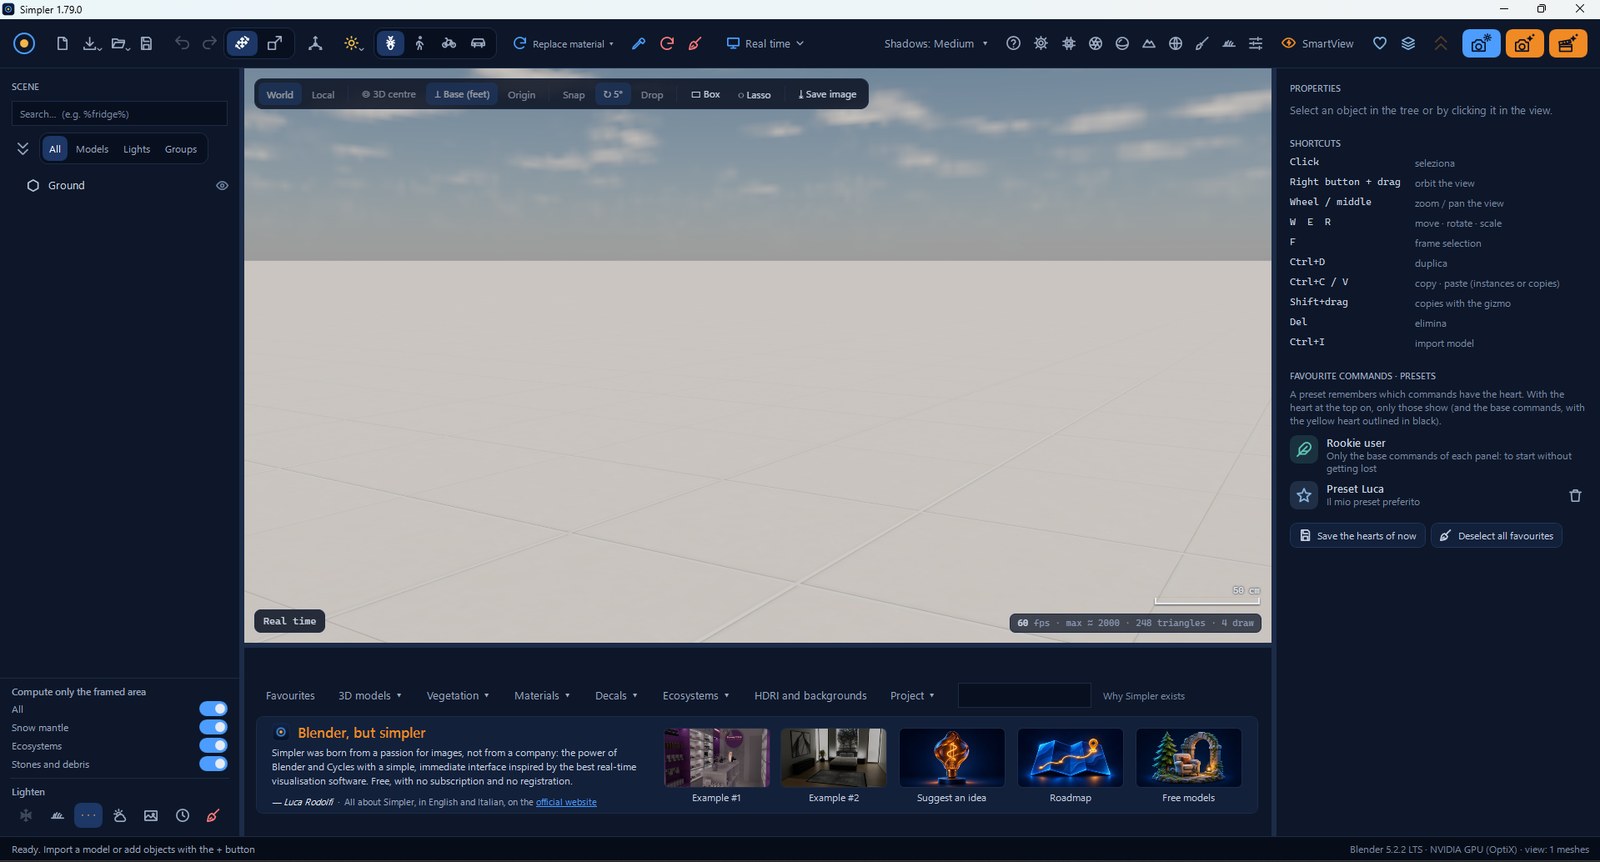
The welcome box is your starting point. Example #1 and Example #2 open two complete projects, a cosmetics shop and a bedroom: Simpler makes your own copy of them, so you can move, break and change everything without fear. In the same box, Suggest an idea lets you propose a feature, Roadmap shows where Simpler is going, and Free models lists websites where you can legally download free 3D models and plants. You find all of them described in Settings and performance.
Your first image in five steps#
Let's make a real image together, starting from the bedroom.
- Click Example #2. The room opens in the real-time view. Take a moment to look around: hold the right mouse button and drag to turn around the room, turn the wheel to move closer, hold the wheel (the middle button) and drag to slide sideways. Nothing you do with the view can damage the project.
- Press the Space bar, or choose Path tracing in the Real time ▾ menu of the toolbar. The image becomes grainy, then cleaner and cleaner: Cycles is following the light as it enters the window and bounces on the walls. After a few seconds you have a photograph.
- Now change the light. Open the Environment panel with the globe button in the toolbar, and click Golden hour. The sun goes down, comes in at a low angle and the room turns warm. Try Overcast too, and see how the same room becomes calm and soft.
- When you like what you see, click Final render, the blue button with the camera, in the toolbar: choose Full HD 1920×1080 and quality High, then Choose the file and render and pick where to save it.
- Wait for the progress bar to finish. Your image is saved at full quality, ready to share.
While the path tracing is refining you can keep working: every change simply restarts the calculation. When you only need to move objects around, go back to Real time: your graphics card will thank you.
Where to go next#
Read The interface to learn the name of each part of the window, then Working in the scene to learn how to place objects precisely. If you already have a model of your own, a building or a piece of furniture in FBX, OBJ, glTF/GLB or USD, jump to Projects and files and bring it in.